One of your most asked questions we get in our photography workshops is how to know where the appropriate place is to crop your portraits. In this video, my model Sammy and I are going to help you out and give you a definitive portrait cropping guide in less than 10 minutes.
Portrait Cropping Guide
1. Avoid Cropping at the Joints
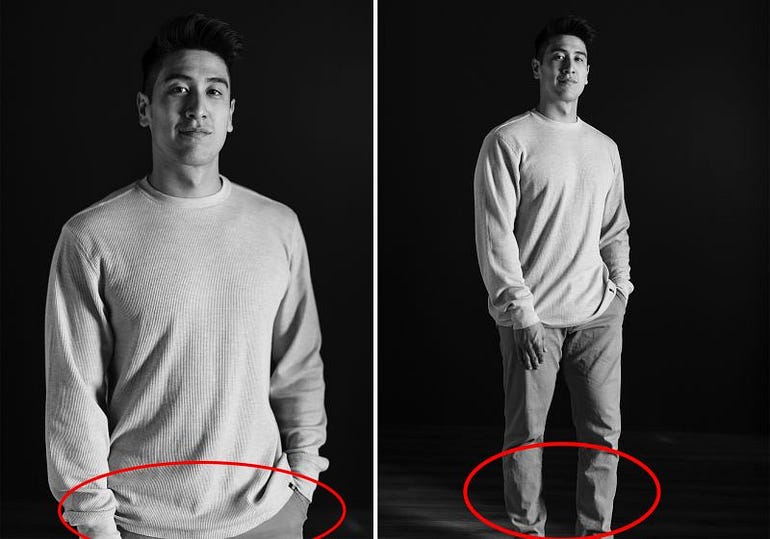
There are so obviously so many joints on the human body so this rule will take some explaining. Let me start by showing you a full body shot so you can see where exactly I am referring to. Starting from the ground up, our first common mistake is cropping out the feet, at the ankle joint. Next, we move up towards the knees, then the hips. Any of these cropping points makes it seem like the subject is missing feet/limbs and missing limbs. Moving up from there you can then examine the elbows, the shoulders and neck, and wrist joints as places to watch out for.